


How to install the GATE ASTER in gearbox v3?

I am generally opposed to the approach to start altering immediately after purchasing them. The exception to this rule is the MOSFET circuit for me. I think that each replica should have at least the simplest system of this type. Since we are already attempting such a modification, it is worth considering an optical system such as the GATE ASTER. In addition to the basic functions, we will also be able to control many other parameters. The lack of moving parts in the optical system will positively affect the durability of our replica. Such a conversion requires a bit of experience, but should not be difficult for most home-grown service technicians. So get your tools out, get your disposable gloves ready, and off you go!
Tools and materials needed for work
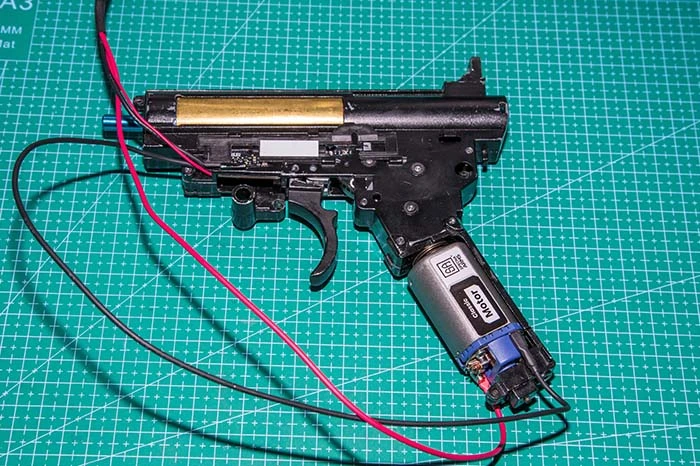
I always smile to myself when the assembly instructions for an element in the airsoft gun say that the necessary tools "do not include anything but the basic workshop equipment". Certainly, how many service technicians, so many interpretations of this formula, so to be sure, I will try to describe here exactly the materials and tools that I used, so that you will find out for yourself which of them are basic and you cannot imagine the service without them and which are less obvious and maybe it is worth taking extra stock up. Of course, a lot will depend on what replica you are working with. I installed the system in the JG608 airsoft gun, so here we have a v.3 gearbox prepared for G36-style airsoft guns. The assembly process will be similar for the construction of the AK platform more or less from the moment the gearbox is removed.
First of all, we need tools such as screwdrivers, hex keys, pliers and possibly punches. A sharp knife and tweezers will also be useful, as well as a measure and files. When it comes to the materials we would need, I would definitely mention isopropyl alcohol and paper towels in the first place. They will be required to clean the gearbox shell well before installing the ASTER system. Despite the fact that it is adapted to work in airsoft guns, it is still quite delicate electronics that do not like dirt, especially on optical sensors. Now that we've washed all the grease off the gearbox, we'll also need a new one to properly lubricate our gears. It may seem counterproductive, but to keep the system clean, I recommend that you first clean the gun's mechanism and then apply a layer of new grease yourself in small amounts. A small brush will also be useful for this operation. Eventually, it may turn out that we need to work on shims our gears, so it's good to have a set of those in stock.
The process of installing the GATE ASTER system

In fact, the first step to install the ASTER system will be to prepare our gearbox for it. We have to take it out of the replica and remove most of the parts inside. In my case, I only left the bearings. Then we proceed to clean the shell from the remains of grease and other dirt. Using a paper towel soaked in isopropyl alcohol, we thoroughly clean the inside of the mechanism of our airsoft gun. We should especially focus on places where gears normally work and, on the place, where the trigger assembly and circuit breaker are usually located, because this is where our new optical system will find its place. When using paper towels, pay attention not to leave any scraps of paper on any sharp edges of the gearbox. Unfortunately, I had a few such contaminants, so I had to remove them before proceeding to the next stage of work.

After thorough cleaning of the surface, we can start fitting the system into its place. The instruction attached to the ASTER system shows quite well what we should pay attention to here. In order for the PCB to sit well in its position, we should first thread the wires through the hole in which the trigger assembly is normally mounted. Then we screw our optical system to the shell with the screw that normally attaches the cut-off level. The GATE ASTER mounting kit includes a set of washers of various thicknesses that can be used if our cut-off level bolt is too long. In my case, everything was screwed with the thinnest washer.

After installing the PCB, we can proceed to the next stage, which is adjusting the trigger. If, as with me, your trigger has a lot of slack, you can compensate for it with the foam stickers added to GATE ASTER. First, I tried on one of the stickers and then glued it into place. Then, using the white flat sticker from the kit, I adapted the trigger to work with the optics. The next step is to work on the selector plate. Most likely, we will have to cut it as it was in my case. I will try to describe it based on the graphic below. The surface of the selector plate to which we stick the appropriate sticker should be 15mm long. If it is longer, it should be shortened. After the sticker is properly mounted, it must come out of the hole in the selector plate that we have just enlarged.

If we already have the GATE ASTER system, the trigger and the selector plate in place, we can start assembling the gearbox together. When mounting the gears of our replica in its place, it is worth checking if the piston gear does not catch on the installed PCB. If that happens, we have to shim it slightly higher than it was before. Then we also have to adjust the shimming of the rest of our gears. In my case it was just like that and in its original form the piston gear was too low, which affected a fragment of the optical system. When we manage to install the gearbox correctly in the lower part of the airsoft gun's body, we can start calibrating the system in accordance with the attached instructions. Calibration is to teach our GATE ASTER what the individual positions of the selector of our replica look like. The procedure is slightly different depending on whether we have a G36 or AK replica, but in short, it consists in carrying out the appropriate sequence of selector and trigger movements. The system confirms the registration of our moves by launching gentle vibrations with the engine, so that the calibration itself should not cause us any problems. After the replica is completely assembled, we can also spend some time manually programming the functions we are interested in using the card with the diagram of functions included in the set or a slightly more detailed description contained in the GATE ASTER manual.
Some additional tips
As mentioned above, when installing the GATE ASTER system, we have to completely disassemble the gearbox of our airsoft gun. This is a good opportunity to deal with other potential problems that we may have with the mechanism. It is worth considering replacing some parts, such as gears, or improving the pneumatics of our gun by using better quality pistons, cylinder assemblies or nozzles. Another good investment when installing an optical system is to use a good quality LiPo battery. GATE ASTER can easily work with 11.1V batteries. When choosing one of the airsoft brands of power sources, we should not have any problems with choosing the right package for our replica.
When it comes to practical advice, in the first place, I strongly recommend that you read the instructions attached to the system several times before installing the device. It may seem unclear in places, but by supplementing it with the advice in this text, the assembly process will certainly become more understandable. I recommend that all work is done in disposable gloves. Thanks to this, we minimize the likelihood of contamination of delicate optical sensors in our GATE ASTER system. Before the final assembly of the gearbox, I also used hygiene sticks soaked in isopropyl alcohol to additionally clean the PCB and the sensors on it. We also definitely do not want to use force, especially when putting the system in place. In my experience, most likely, if it does not want to jump into place naturally, it is probably blocked by wires or a protruding element of the gearbox shell. In this case, you have to step back a little and try to insert the PCB at a slightly different angle. For me, after a few such attempts, I managed to put the GATE ASTER into place without any problems, according to the instructions in the manual.
Final effect
After installing the ASTER system, we get the opportunity to program very useful functions of our airsoft gun. In my opinion, the most important of them are pre-cocking, i.e., pre-tensioning the spring, which improves the response to the trigger, and the active brake, i.e., protection against unnecessarily long cycle after pressing the trigger. In addition, I really appreciate the alternative fire modes. One of such settings that I use is double single fire, which replaces the automatic fire setting, which is useful when we play indoor or other CQB games. Another mode that I also like is short bursts, the length of which can be adjusted.
When considering the purchase of the GATE ASTER chip, it is worth buying additionally either USB link module or even better Blu link module. These are add-ons from the GATE company that we plug into the battery socket and they allow you to program our ASTER through an application on the phone. It is not necessary to enjoy the operation of the system, but it definitely makes life easier, especially if we use one replica for many applications and often change the profile settings of our optical system.
As my example shows, the assembly of the GATE ASTER system is possible even for a person who has rather basic service knowledge. I would definitely not call myself an expert, but by following the instructions in the manual, I was able to successfully equip my replica with an optical system. This text will be an additional convenience for you. However, if you still have doubts and are not sure if you will be able to assemble the replica well after installing the GATE ASTER, you can always consider the option of ordering the assembly of the system, which is offered by the Gunfire.pl website. The specialists there will surely be able to install the device in our replica and it will give us peace of mind and confidence that the optical system, for which we have devoted some of our savings, will be installed correctly.
Author: Boreq
Check out similar entries:


